
The Killer In 1978’s Horror Hit Halloween Wore A Mask Of Which Sci-Fi Actor? |
|
Think you know the answer? |
|

from How-To Geek https://ift.tt/2PF0z3A

The Killer In 1978’s Horror Hit Halloween Wore A Mask Of Which Sci-Fi Actor? |
|
Think you know the answer? |
|
The Killer In 1978’s Horror Hit Halloween Wore A Mask Of Which Sci-Fi Actor? |
|
Think you know the answer? |
|

DJI Mavic has launched a new uber-compact and ultra-light drone that can be flown without being registered with the Federal Aviation Administration (FAA) and can be folded up into a palm-sized package when not being used.
The DJI Mavic Mini weighs only 249 grams (8.78 ounces) and that figure includes the weight of the microSD card that comes with the package. What’s more, the drone’s battery weighs 100 grams alone, which doesn’t leave much of a budget for everything else.
Because the drone weighs only 249 grams, it’s one gram short of falling under FAA regulation for requiring a registration. DJI Mavic says that distilling top-end features into such a small design was one of the most challenging projects the company has ever tackled.
The Mavic Mini has a lengthy spec sheet with features that include the ability to capture 12-megapixel aerial photos and 2.7K Quad HD video footage at 30 frames per second (or 1080 @ 60fps).
The included remote control lets you view a 720p video transmission from the drone for up to 4km (2.5 miles), a three-axis motorized gimbal ensures stable image capture, while GPS lets you bring the drone back with ease after exploring your limits. DJI Mavic claims a maximum flight time of up to 30 minutes straight
Pre-orders are open now with units expected to ship November 11. Pricing is set at $399 for the Standard version and $499 for the Fly More Combo. The Standard version ships with the Mavic Mini drone, a remote controller, one battery, extra propellers, as well as all the tools and wires you need to get up and running. For another hundred bucks, the Fly More Combo throws in a 360-degree propeller cage for extra protection, a two-way charging hub, three batteries instead of one, three sets of extra propellers, and a carrying case.
Source: DJI Mavic via Drone DJ

Whether you have two integers, a few cells, or a couple of columns that need to be multiplied together, Google Sheets provides a few different ways to find the product of your data. Here’s how.
There are two ways to find the product of two numbers. One uses a built-in formula, while the other uses the multiply operand to complete the calculation. Both work virtually the same and multiply numbers just as you would expect.
Fire up your browser, head to Google Sheets, and open a spreadsheet.
Click on an empty cell and type =MULTIPLY(<number1>,<number2>) into the formula entry field, replacing <number1> and <number2> with the two integers you want to multiply.

You can also use the data inside another cell. Instead of a number, type the cell number and Sheets will automatically put the integer from that cell in its place.

After you input the numbers or cell numbers, press the Enter key and Sheets will place the results in the cell.

Having an overabundance of Halloween candy after a shortage of trick-or-treaters can make for a disappointing night. So what’s one to do with all these extra goodies?
Throwing things in the trash can feel like money waste, especially when we’re talking about over-priced candy around this spooky season. No, you don’t have to eat it all either. Freezing your candy is a great frugal solution for all sorts of edible treats. Let’s take a look at this frosty candy fix (and when it’s best to avoid it).
Seal your candy using an airtight container, freezer bag, or heavy-duty freezer wrap. Be sure to label your airtight container with the date and type of candy you are freezing. It’s also good practice to add an expiration date so you can easily track when it needs to get dumped.
Each type of candy has its specific guidelines for storing. Follow the recommendations below for frighteningly fresh results.
According to the National Confections Association, many different types of candies do well as long as they’re wrapped appropriately and stored in a cool, dry place. The NCA also claims that you should avoid freezing candy with fruits and nuts. Here’s are a few recommendations for freezing your candy.
RELATED: Chocolate Is Nutritious (A Delicious Half-Truth to Justify Your Halloween Indulgence)
Dark Chocolate: Freezing dark chocolate doesn’t necessarily extend the shelf life, but if you live somewhere warm, it’s a good option. As long as it’s sealed properly, you can keep it for up to two years. But do you really think you can store it away for years without indulging in a few bites?
Milk and White Chocolate: This type of chocolate will last up to a year in the freezer or an airtight container at room temperature.
Gummy Candy: As long as you properly seal and store gummies, they will last up to twelve months in the freezer for the best quality.
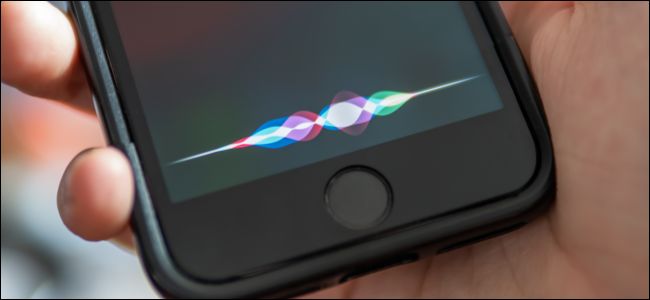
Apple’s new iOS 13.2 upgrade for iPhones and iPads offers improved privacy controls for Siri. You can now choose whether you want humans listening to snippets of your Siri interactions. You can delete any existing recordings from Apple’s servers, too.
Your iPhone or iPad will prompt you about this after the upgrade. You’ll see an “Improve Siri & Dictation” screen. If you select “Share Audio Recordings,” your device will share your recordings with Apple, and they may be listened to by humans to help improve Siri.
To find these options, head to Settings > Privacy > Analytics & Improvements. You’ll find the Analytics & Improvements option at the bottom of the Privacy screen.

Ensure the “Improve Siri & Dictation” option here is toggled off. If it’s on, your iPhone or iPad will share clips of your voice with Apple.
With this option disabled, Apple won’t store or review audio of future interactions from this device. To delete audio of older interactions from Apple’s servers, you’ll have to use the below option as well.
If you have multiple devices—for example, an iPhone and an iPad—disabling Improve Siri & Dictation on one won’t disabled it on the other. You’ll have to toggle this option separately on each device you use.

To delete the history from Apple’s servers, head to Settings > Siri & Search > Siri & Dictation History.

Spotify is testing a new Kid’s app for Premium Family subscribers, and it might save your sanity. The standalone app will feature human-curated music, playlists, and kid-friendly graphics. All while keeping music your little ones aren’t ready for out of sight.

If you want to let your young children use Spotify, you currently have two basic choices: let them use your account or create an account for them and try to curate it by hand. Neither choice is great.
Choosing to share your account with your children means you’ll find your playlists and Daily Mix suggestions taken over by Disney music and TV show theme songs.
And creating a separate account isn’t great either. Spotify’s controls for children are less than adequate. It’s only recently that the service even added explicit filters, for one. And blocking explicit songs still isn’t perfect. You may encounter some songs that should be marked explicit but aren’t yet (that’s quickly improving). And just because a song isn’t explicit doesn’t mean it’s kid-appropriate.
The above screenshot comes from a seven-year old’s Spotify account. Spotify noticed he favors Disney music, so clearly, he likes musicals. Thus it suggested music from Sweeny Todd. That’s the problem with algorithm-generated playlists and suggestions; computers don’t understand context like a human can. And that’s where the new Spotify Kid’s app (available in Ireland to start, but coming to more countries soon) comes in to play.

The Spotify Kid’s app (available for iOS and Android if you’re in Ireland) looks completely different from the standard Spotify app. For instance, the colors are brighter, and your children get to pick a cute avatar that looks like something out of the Endless Alphabet app.
But more importantly, all the music your children will have access to is human-curated. Someone somewhere listened to the song and confirmed it’s child-appropriate. When you create your child’s account, you can choose from two age categories to determine what kind of music they can hear. The Younger Kids grouping sticks to music from Disney and children’s stories. Older kids get access to pop songs that are still family appropriate.
The app is also ad-free, and Spotify won’t sell data from it to third-party advertisers. The company did specify it will only share data to third-parties for select reasons, like connecting to your smart TV.
That makes the Kid’s app a better choice from a privacy standpoint than using a full-blown account on the official app. Spotify didn’t specify when the app will roll out to other markets, but you can keep an out at the Kid’s site for more information.

No matter how often you get on a plane, it’s hard not to feel a little thrill of excitement at takeoff. And for some people, that little thrill can quickly turn into major anxiety about leaving the ground so far behind.
RELATED: How to Overcome Your Fear of Flying
Few people feel that same discomfort when it comes to getting in a car, though. You might have heard that flying is actually safer than driving—but it probably seems hard to believe. How could traveling thousands of feet in the air possibly be safer than traveling on the ground?
But strange as it sounds, flying really is safer than driving. Let’s take a closer look at how it works—this might make you feel a little better about those holiday flights you’ve booked.
The handful of high-profile plane crashes in the news in recent years might have given you second thoughts about boarding a plane. However, flying remains safer than driving by a long shot.
The International Air Transport Association reports that there was just one major accident for every 5.4 million flights in 2018. This means your odds of being in a plane crash are ridiculously low. And as years go by, plane travel is getting even safer. New regulations, higher training standards, and better technology are all contributing to improved flight safety.
For example, pilots now have to follow certain rules to make sure they get enough rest before a flight, minimizing the risk of a crash due to pilot fatigue. There are also two pilots in the cockpit all the time for safety.
Planes today have better engines and backup systems than they once did. The automation of a plane can often make up for any human errors, giving us a system that gets a little more foolproof every year.
Finally, better satellite tech also makes flying safer, by helping planes avoid risky weather and mapping out the safest routes possible.

Like other modern web browsers, Chrome lets you quickly reopen tabs and windows you’ve recently closed. Google moved this option a bit in Chrome 78, but it’s still easy to find if you know where to look.
This won’t let you reopen windows and tabs opened in Chrome’s Incognito Mode. Chrome forgets about those tabs as soon as you close them.
To reopen a closed tab in Chrome, right-click on an empty space in the tab bar and select “Reopen Closed Tab.” If you recently closed a window instead of a tab, you’ll see a “Reopen Closed Window” option here instead.
This will open the most recently closed tab. Repeat this process to reopen tabs in the order they were closed, going back through your history.
On a Mac with a single mouse button, hold down the Ctrl key and click instead of right-clicking.

Previously, you could simply right-click a tab on Chrome’s tab bar and select “Reopen Closed Tab.” That option no longer appears in the tab right-click context menu. You have to right-click on an empty space to find it.
You can also press Ctrl+Shift+T to reopen a closed tab with a keyboard shortcut. If you recently closed a window, this will reopen the closed window instead.

You’ve used a portable battery to charge your phone, but have you ever used one with your MacBook Pro, Pixelbook, or Nintendo Switch? With the right power bank, it’s just like charging your device from the wall.
You can thank USB-C for making this possible The USB-C power standard is capable of some seriously high charging speeds, which is why it’s showing up on every kind of device, from laptops to game consoles. But most power banks are made for phones, so you have to find one that’s powerful enough to work with your larger devices (it’ll still work with your phone too—USB-C devices have built-in voltage regulators).
You can’t use just any battery to charge your larger devices, so you have to find one with a decently high capacity and charging speed. This sounds complicated, but it’s actually pretty simple. There’s no math involved; just look out for milliamp hours and watts:
Now that you know how to read a power bank’s capacity and charging speed, it’s time to think about your USB-C devices. Do you need a portable battery that can charge a Pixelbook or a battery that can charge a Nintendo Switch? Both?
Here are some popular USB-C devices along with their battery capacity and charging speed. (If you want your devices to charge as quickly as possible, then you should get a battery that meets or exceeds your device’s wattage):
Alright, now that you have an idea of what you’re looking for, it’s time to start shopping. Here are the best portable batteries for all of your devices, along with their charging speed and capacity.

Looking for a battery that can do it all? The imuto power bank has a massive capacity of 30,000mAh and charges at 45-watts over USB-C. In other words, it has the speed and power to get your laptop through a few days of work. The imuto also has two USB-A outputs (you can charge from all ports at once), and it has a display to show its remaining power.
At 1.25-pounds, the imuto is a heavy battery. But with its 30,000mAh capacity, it’s clearly meant for long trips. Just keep in mind that its capacity actually exceeds the TSA and FAA guidelines for lithium-ion battery size (27,000mAh or 100 watt-hours). You can still take the imuto on a plane, but you’ll have to get approval from your airline first.

The imuto’s massive 30,000mAh capacity and lightning-fast 45-watt charging speeds make it the perfect companion for laptops, game consoles, tablets, and phones.

Have you ever wanted to go looking for buried treasure? It’s a lot easier when you see can see below the surface. A good metal detector will help your search whether you’re hunting for history or digging for gold.
It turns out metal detectors aren’t cheap. A good entry-level machine is going to be at least $200, and they quickly skyrocket in price. So, if you’re planning on purchasing one, you’ll want to know that it will work for you.
There is a lot more that goes into using a metal detector than just waving it around, hoping for it to go off. You need to understand where to go to find buried treasures. There are hundreds of thousands of leftover bullets, shells, and artifacts buried on battlefields across the world (be careful; not everything you’ll find will be defused.) Beaches are another popular spot because things get lost in the sand and washed onshore.
Metal detectors are a considerable investment and should only be undertaken if you want it to become a serious hobby. If you’re just trying to find a lost ring in your backyard, consider finding one to rent or borrow from a friend. If you do want to get involved in the hobby, consider joining a detecting club or visiting an online community for hunters like r/metaldetecting on Reddit to help you get started using your new detector.

The Minelab Equinox has everything one will need to start searching for buried treasure. The machine has five different operating frequencies ranging from a low 5kHZ for deep coins to a high 40kHz gold detecting frequency. It can also be used in multi-frequency mode to make sure that you don’t miss anything beneath the surface. Your search can then be even more customized with options for depth and sensitivity.
The machine has a wide double-D shaped coil, giving it a lot of range. It also includes a protective coil cover. The whole machine is water-proof; you can wade into the water to use this at a depth of up to ten feet. So, it works rain or shine, on and off land.
The detector includes its own set of headphones and a wireless module for a low latency Bluetooth connection. There’s also an aux cable for wired audio and a charger for the headphones. The metal detector itself has a magnetic charging cord, which is just a small quality of life feature that prevents damage to your machine from accidentally yanking on the cord.

The Minelab Equinox 800 has a full range of multi-frequency search abilities and a wide double-D shaped coil that allows it to search for any metal deep beneath the surface.
$899.00
More offers


Gmail is already a pretty airtight email service without needing any customization. But if you feel like there’s something left to be desired, there are a few hidden features—and Chrome extensions—to make Gmail even better.
Keyboard shortcuts are designed to make your life easier by creating key combinations to complete some of the most-used actions within a service. A lot of Google products offer keyboard shortcuts including Google Docs, Sheets, Chrome, and Gmail.
While some of Gmail’s keyboard shortcuts work by default, you need to enable a setting to get full access to them all.
From your Gmail Inbox on the web, click the Settings cog and then select the “Settings” button.

From the General tab, scroll down to the section labeled “Keyboard shortcuts” and click the button next to “Keyboard Shortcuts On.”

Scroll to the bottom of the menu and click “Save Changes” before you return to your inbox.

Your iPhone can multitask while you’re on a phone call. Whether you want to check your email, browse the web, or even play a game, you can do all that and more; here’s how.

To take a phone call while you do something else on your iPhone, you have to be able to speak to the other person on the line. You can use the speakerphone mode to do this—just tap “Speaker” to activate it.
If you have AirPods or Beats headphones with in-ear detection, simply put them in your ears, and your iPhone takes care of the rest. Regular old Bluetooth headphones with a microphone work, too—just put them in your ears and turn them on. If your wireless headphones don’t show up, tap “Audio” on the call screen, and then select your headphones from the list.
You can also use wired headphones with a built-in microphone; all you have to do is plug them in and use them normally. On older iPhones, you can use any headphones with a headphone plug. On newer iPhones, you need wired Lightning headphones like the pair that came with your phone. You can also use traditional headphones with a headphone jack dongle.

With your headphones in or speakerphone activated, you can talk on a call without holding your iPhone to your ear. To do something else on your iPhone, you can leave the call screen like you’d leave any app and go to the home screen. Press the home button if your iPhone has one; if it doesn’t, swipe up from the bottom of the screen.
After you leave the call, if you have an iPhone X, XR, XS, or 11, you should see a green bar in the top-left corner of the screen. On older iPhones, the bar stretches across the entire top of the display.

I’ve had my Galaxy Note 8 for more than two years now, and though I’ve been tempted by new Pixels and OnePlus phones, I don’t think I’ll be updating any time soon. And according to market research, I’m not alone.
People are waiting longer and longer between big phone purchases, driven mostly by huge price increases at the top of the market. It’s having some interesting effects, as consumers themselves and the market in general start to feel the strain of purse strings. The takeaway is that it’s easier than ever to hang on to that phone for longer and longer.
If you’ve shopped for any flagship phone in the last few years, you’ve noticed a rapid jump up in retail prices. Carriers and even manufacturers themselves have tried to disguise this, hiding behind easy-to-find financing options, but the jump is undeniable. The iPhone 7 started at $650 in 2016, with a fully-loaded 7 Plus version going for $950. Today the “budget” iPhone 11 starts at $700, with the top-of-the-line 11 Pro Max going for an astonishing $1,449.

Samsung and Google have made similar leaps at the top of the flagship space, with most other manufacturers trying to compete for those lucrative, high-margin sales following. Budget brands have been holdouts, with OnePlus, Blu, and Motorola offering more affordable options at predictably lower prices. But those phones don’t get the spots right by the door in Best Buy.
There haven’t been any massive increases in manufacturing costs: The phones are just getting more expensive because manufacturers want to charge more, and for the most part, customers are willing to pay more. At least enough of them are that it offsets any loss in sales those high prices might create.
The thing is, with the notable exception of cameras, these fantastically-priced phones aren’t actually offering much more than they used to. Phone screens have gotten bigger, processors have gotten faster, storage has become more generous in general, but most of us are using the same old apps, browsers, and communication tools that we were before prices started to inflate.

Go into a carrier store and ask, “What will this new phone do better than my old one?” The first response you’ll hear is that the camera is better—and it is, undeniably. Camera upgrades, both in terms of the sensors and lenses of the hardware and the phenomenal image processing in the software, appears to be driving plenty of high-end phone sales. Apple and Google both ended their latest phone reveals talking almost exclusively about how wonderful their cameras are, and not unjustifiably so.
But if you don’t need a camera that blows your old phone out of the water, and you’re not looking for some specific and esoteric feature like Google’s questionably useful radar tech or OnePlus’s eye-catching pop-up selfie cam, it’s easy enough to just sit on the phone you have. Especially when you look at retail prices. It helps that, especially for phones from Android manufacturers like Google and Samsung, waiting a few months past launch means you can find triple-digit savings in sales.
Which Of These Common Candies Puts You At Risk For Heart Problems? |
|
Think you know the answer? |
|
Which Of These Common Candies Puts You At Risk For Heart Problems? |
|
Think you know the answer? |
|

Microsoft is on a roll with Windows 10’s open-source PowerToys. The latest free tool is PowerRename, a bulk renaming tool that will let you rename many files at once right from File Explorer.
To use it, download and install Microsoft’s PowerToys. Launch the PowerToys application and activate the “PowerRename” option on the General Settings page.

Next, head to File Explorer, right-click multiple files or folders, and select “PowerRename.” If you right-click one or more folders, PowerRename will let you operate on every file inside them as well as the names of the folders themselves.

PowerRename is pretty simple to use. At the top of the window, type what you want to search for and then what you want to replace it with. You’ll see a preview of what PowerRename will do. If you’re happy with the results, click “Rename.” If you want to avoid renaming a file, uncheck it in the Preview list.
The options section lets you toggle additional options to control how power rename functions, from case sensitivity to whether it operates on just the name or file extension. You can exclude files, folders, or subfolder items. The preview makes it easy to see exactly what these options do.

There’s one nice power-user feature here: “Use Regular Expressions.” These will let you perform more complex search patterns for modifying your file names. The PowerRename documentation offers a few example regular expressions for this tool. Master regular expressions and you can do nearly anything you can imagine with PowerRename.

Razer has announced a new pair of wireless earbuds that have been engineered with an emphasis on delivering minimal lag when playing games and eliminating the stutters and desyncing that you may have come to expect from similar Bluetooth devices.
The company says that its Hammerhead True Wireless earbuds are equipped with “customized Bluetooth 5.0” that enables ultra-low latency performance, high quality audio, and extended battery life. It’s unclear what Razer has done to customize the Hammerhead’s implementation of Bluetooth 5.0, but perhaps this is something we can elaborate on in the coming weeks if we go hands-on with the product.
In any event, that custom implementation of Bluetooth 5.0 allows the Hammerhead earbuds to deliver an audio latency of just 60ms, which isn’t as low as the latency you’d expect from wired headphones, but it’s a significant improvement over the 204ms you’d get from the Apple AirPods 2, according to testing conducted by RTINGS.com.
Besides being a bane to gamers, latency can be a problem for music and video producers, or even someone who just wants to watch Netflix with the audio and video in sync. From what we’ve read, AirPods use codecs to compensate for its audio latency in some situations. That shouldn’t be as necessary with the Hammerhead’s 60ms delay. Note however that this timing requires “Gaming Mode” to be enabled and we’re not entirely sure what that entails yet.
The earbuds are equipped with a 13mm driver and a 20-20kHz frequency response that is said to encompass “beefy bass” and “top-end clarity” when listening to music, movies, and games. While they might have a better latency for gaming, the Hammerhead earbuds are limited to a sub-par three-hour battery life, though you get up to four charges (15 hours total) from the bundled recharging case. It also takes an hour and a half to build up that three hour charge from a drained battery.

Other specs include what you’d expect to find on wireless earbuds, such as a microphone and touch controls:
Headphones
Microphone
Touch controls

Although Motorola abandoned the smartwatch market a few years ago, the original Moto 360 smartwatch has nonetheless received a makeover and will be relaunching as a third-generation product—only this time it’s not made by Motorola.
Instead, an independent consumer electronics company known as “eBuyNow” has found itself in charge of the task. The company’s business model appears to be finding niche gaps in the consumer electronics market and at least in this case, licensing the rights to build and market the product.
Due to ship in December, the third-generation Moto 360 features a Qualcomm Snapdragon 3100 processor, 1GB of RAM, 8GB of storage, Bluetooth 4.2, Wi-Fi b/g/n, as well as sensors including a heart rate monitor, GPS, and NFC for mobile payments.
The face of the watch has a circular, 1.2-inch AMOLED touchscreen with Corning Gorilla Glass 3 and a resolution of 390 x 390 pixels. The color display can be set to always-on while the 355mAh battery can be charged to full in only one hour when placed on the bundled charging cradle. All-day battery life is touted, but maybe more impressive is the claim that a battery saver mode lets the third-gen Moto 360 continue displaying the time for three days even when the battery is critical.

There are two buttons on the side of the watch: the top one rotates and scrolls through the watch’s software interface, while the bottom button can be set to launch a custom app. The device runs Wear OS, the Android-based operating system Google developed for wearables. It features Google Assistant, Google Pay, and Google Fit. The Moto 360’s software supports Android 5.0 and iOS 10.0 or higher.
Color options include a black watch face with a black band, a gold face with a white band, and silver with brown. The strap measures 20mm wide and is made of leather or fluoro rubber. Each order includes a silicone strap for aquatic endeavors and it’s noted that the Moto 360 can be worn while swimming for up to 10,000 strokes. Is there an app to track that?
Pricing is set at $350 or £340 and pre-orders are expected to begin at Moto360.com in the middle of November for folks who live in the US, UK, and Canada. Availability through select major retailers is slated for the following month in December.
Source: Moto360.com via Engadget

Brochures are a handy marketing tool used by nearly every company in existence. Creating them takes only a few minutes, and you can do it directly in Word using a template or from scratch. Here’s how.
The easiest way to create a brochure is by using one of the many available templates that Word has to offer.
RELATED: How to Make Vertical Tear-Off Pages in Microsoft Word
To get started with a template, open a new document, type “Brochure” in the template search box, then press the “Enter” key. Word’s large library of brochure templates will appear. Select one that you like.

Once selected, a banner that contains information about the template will appear. Read through the information and then select the “Create” button.

Now all you need to do is insert the relevant text and images in the template placeholders and then start distributing the brochure.