
A video doorbell is the best smarthome gadgets you can own. But, if you’ve never installed any doorbell before, the actual installation can feel a little daunting. It’s a pretty easy installation process—we’ll walk you through it.
The Basics
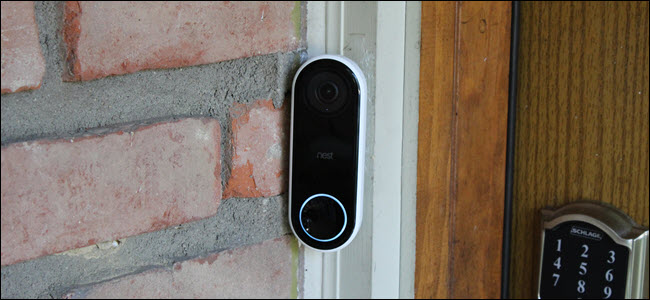
For this guide, we’ll be installing a Nest Hello. Every video doorbell is different, but they share most of the same basic similarities. You’ll need a screwdriver, a drill, pliers, and to shut power off if you are installing a wired doorbell. Some video doorbells can ring your home’s chime, so you may need to find your chime box too.
You can pay a professional to install the doorbell for you, of course—but we’ll show you how to do it yourself.
Turn off Power
If your video doorbell works with your home’s wiring, the absolute first thing you should do is turn off the power in your circuit breaker box. If you aren’t sure which breaker switch controls your doorbell, you can try switches that are close to your doorbell and close to the chime box. After you flip a breaker, try to ring your doorbell. When it’s not working, you go the right one.
Find the Chimebox

If your video doorbell can ring your home’s chime box, it typically comes with a box that wires to your chime to achieve that. First, find the chime box and remove it. Then look for two wires leading to screws marked “trans” (for transformer) and “front” (or “back” if this is a second doorbell).

Depending on your hardware, you’ll do one of two things. With Nest Hello, you should remove the existing wires, attach them to the chime accessories cable slots, then wire in the two bare wires at the screws.
With other chime hardware, you’ll remove the two wires from their chime terminals and twist them together with the video doorbell hardware’s wires, then reconnect them back to the terminals.
Once you have the wires connected, tuck the hardware into any empty cavity space you can find. But make sure you don’t interfere with the strikes that hit the metal bars to chime.

Replace your chime box cover and move to your doorbell.
Installing the Doorbell
Read the remaining 13 paragraphs
from How-To Geek https://ift.tt/32gpIoh
No comments:
Post a Comment